常规部署方式
# 后端部署
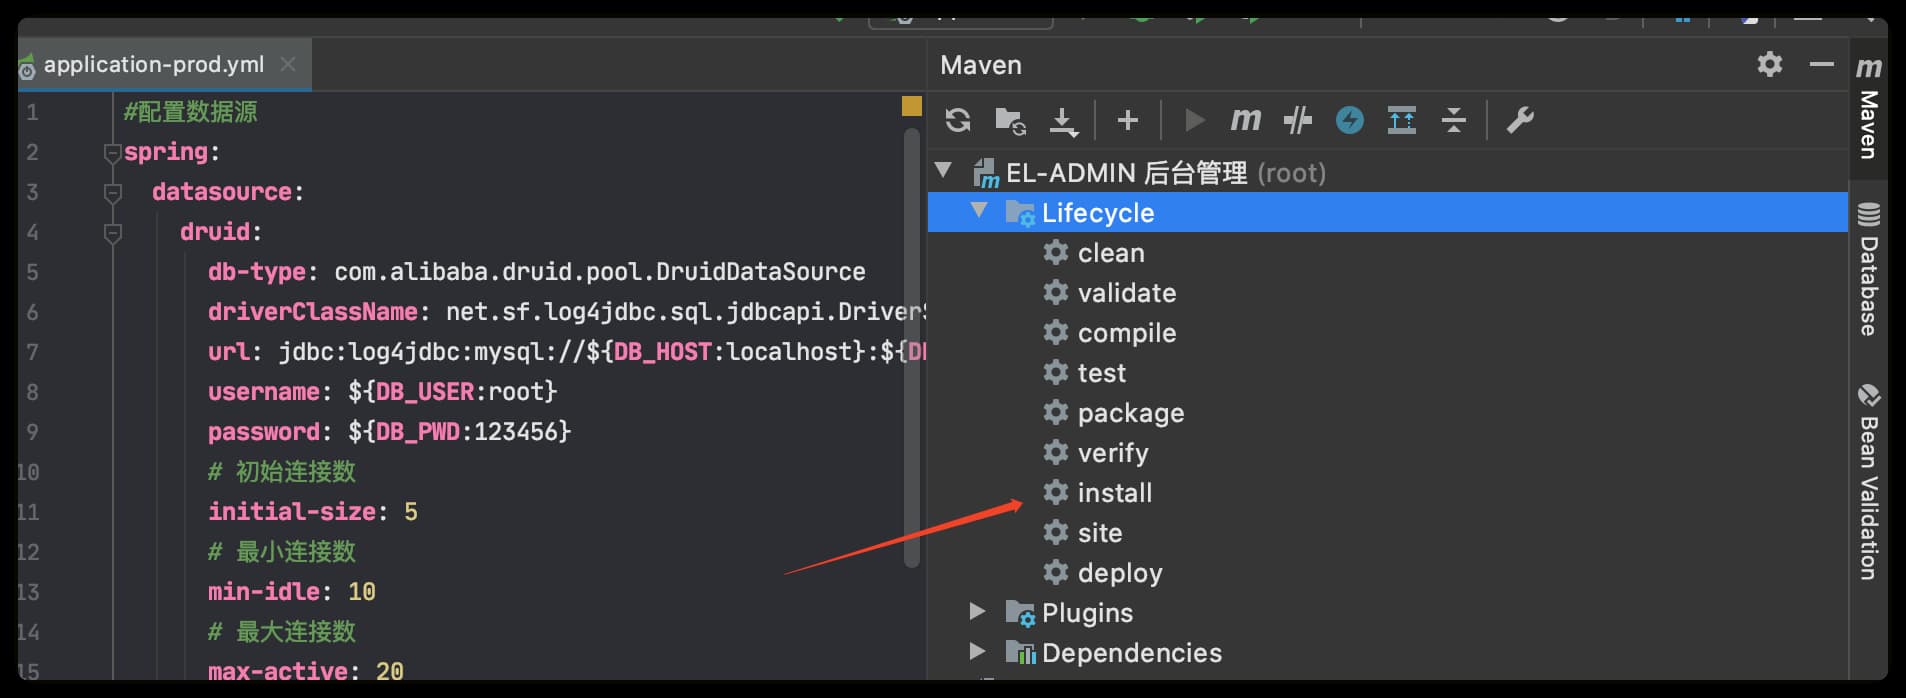
按需修改我们的 application-prod.yml,如需打开 Swagger ,那么需要将 enabled 设置为 true
swagger:
  enabled: true
1
2
2
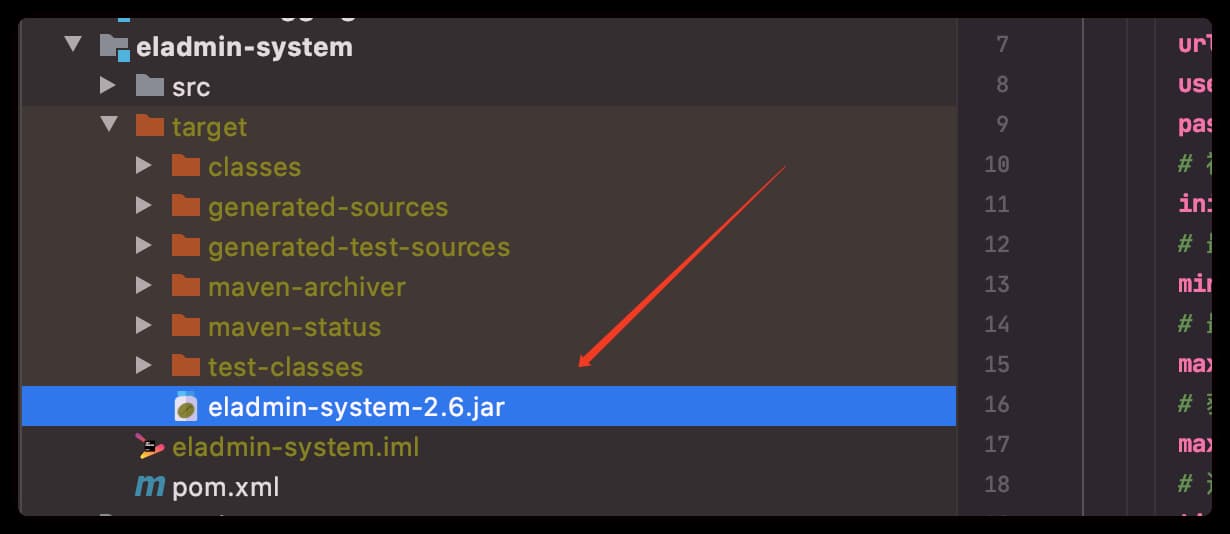
我们需要将项目打包好的 Jar 文件上传到服务器,步骤图如下:
编写脚本用于操作 java 服务
(1) 启动脚本 start.sh
nohup java -jar eladmin-system-2.6.jar --spring.profiles.active=prod > nohup.out 2>&1 &
1
(2) 停止脚本 stop.sh
PID=$(ps -ef | grep eladmin-system-2.6.jar | grep -v grep | awk '{ print $2 }')
if [ -z "$PID" ]
then
echo Application is already stopped
else
echo kill -9 $PID
kill -9 $PID
fi
1
2
3
4
5
6
7
8
2
3
4
5
6
7
8
(3) 查看日志脚本 log.sh
tail -f nohup.out
1
脚本创建完成后就可以操作 java 服务了
# 启动java
./start.sh
# 停止java服务
./stop.sh
# 查看日志
./log.sh
1
2
3
4
5
6
2
3
4
5
6
配置 nginx: 我们可以使用 nginx 代理 java服务,添加配置
server {
    listen 80;
    server_name 域名/当前服务器外网IP;
    location / {
        proxy_pass http://127.0.0.1:8000; #这里的端口记得改成项目对应的哦
        proxy_set_header X-Forwarded-Proto $scheme;
        proxy_set_header X-Forwarded-Port $server_port;
        proxy_set_header X-Forwarded-For $proxy_add_x_forwarded_for;
        proxy_set_header Upgrade $http_upgrade;
        proxy_set_header Connection "upgrade";
        }
    }
1
2
3
4
5
6
7
8
9
10
11
12
2
3
4
5
6
7
8
9
10
11
12
# 前端部署
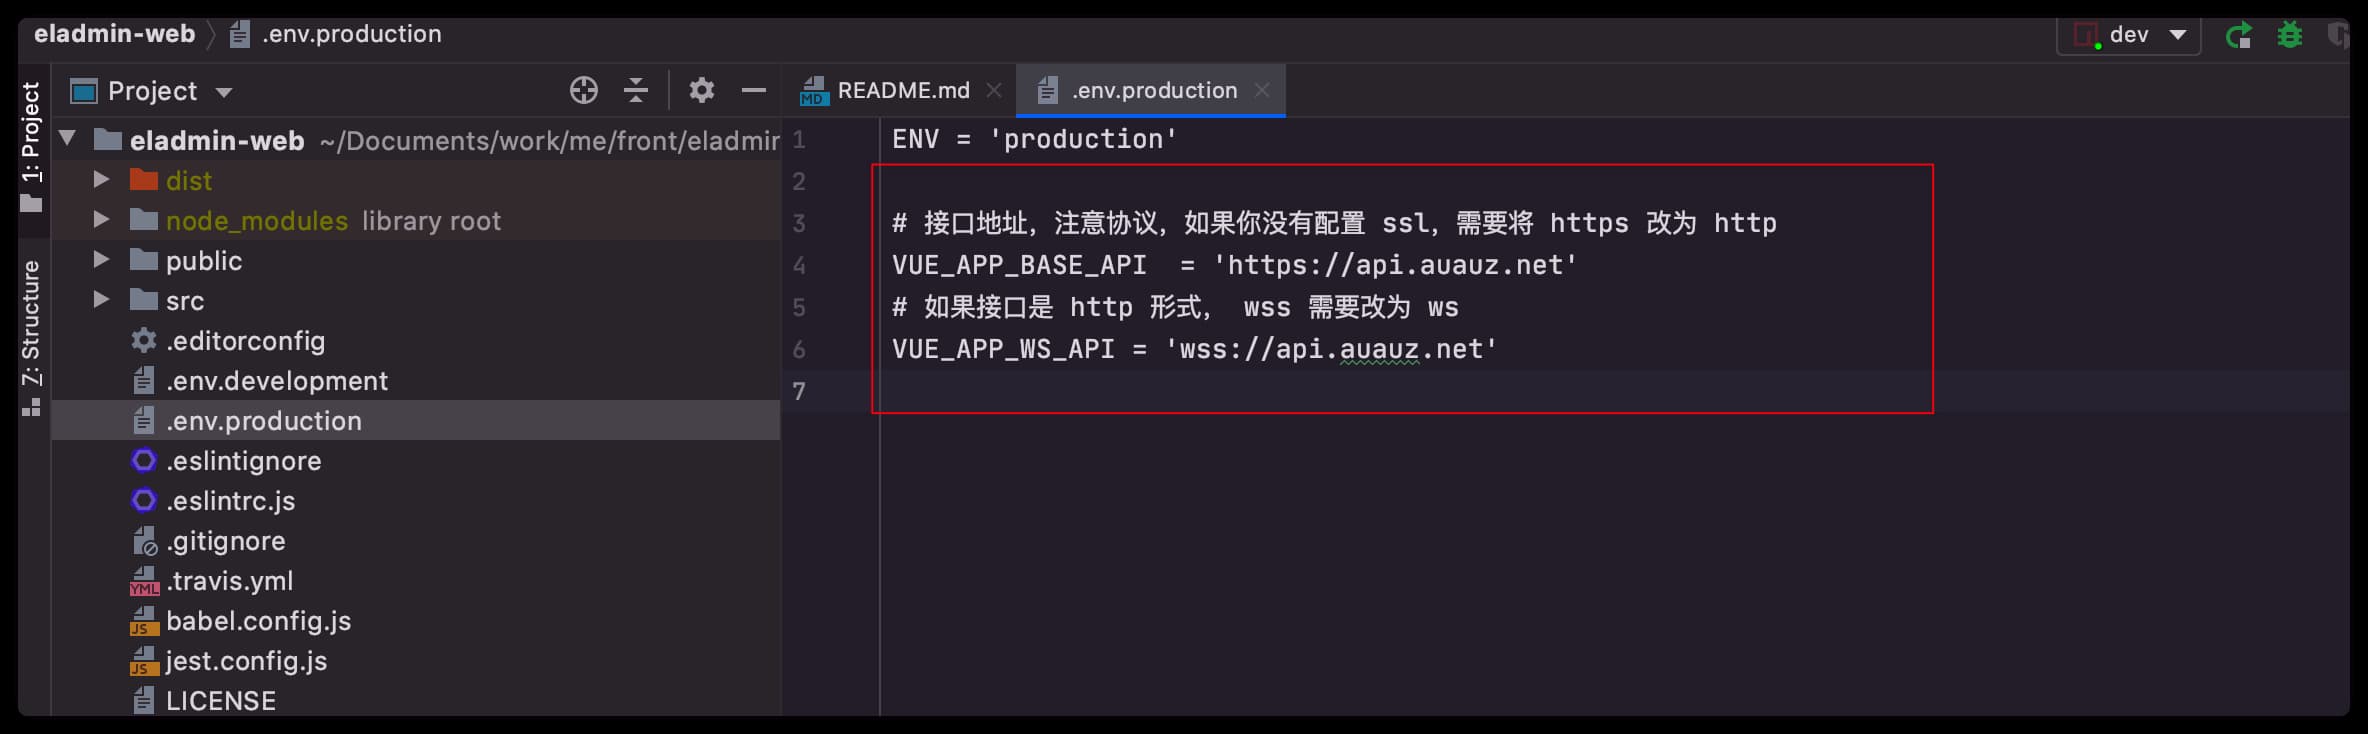
这里提供两个配置方式 [History、Hash] 的部署方式,首先修改接口地址,如果是 IP 地址,那么需要修改为外网 IP
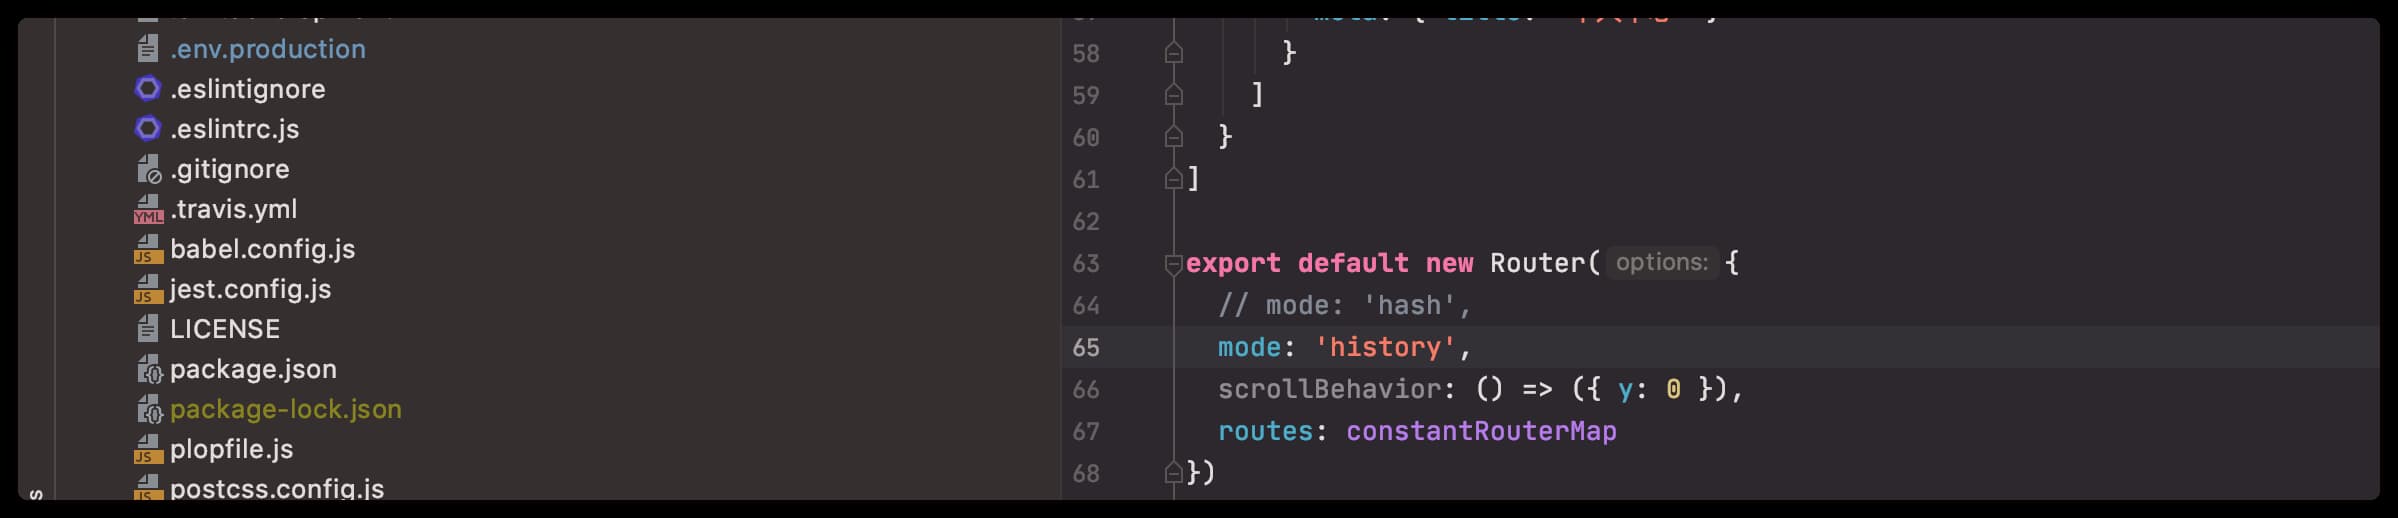
# History 模式
项目默认是 History 模式,不需要做任何修改
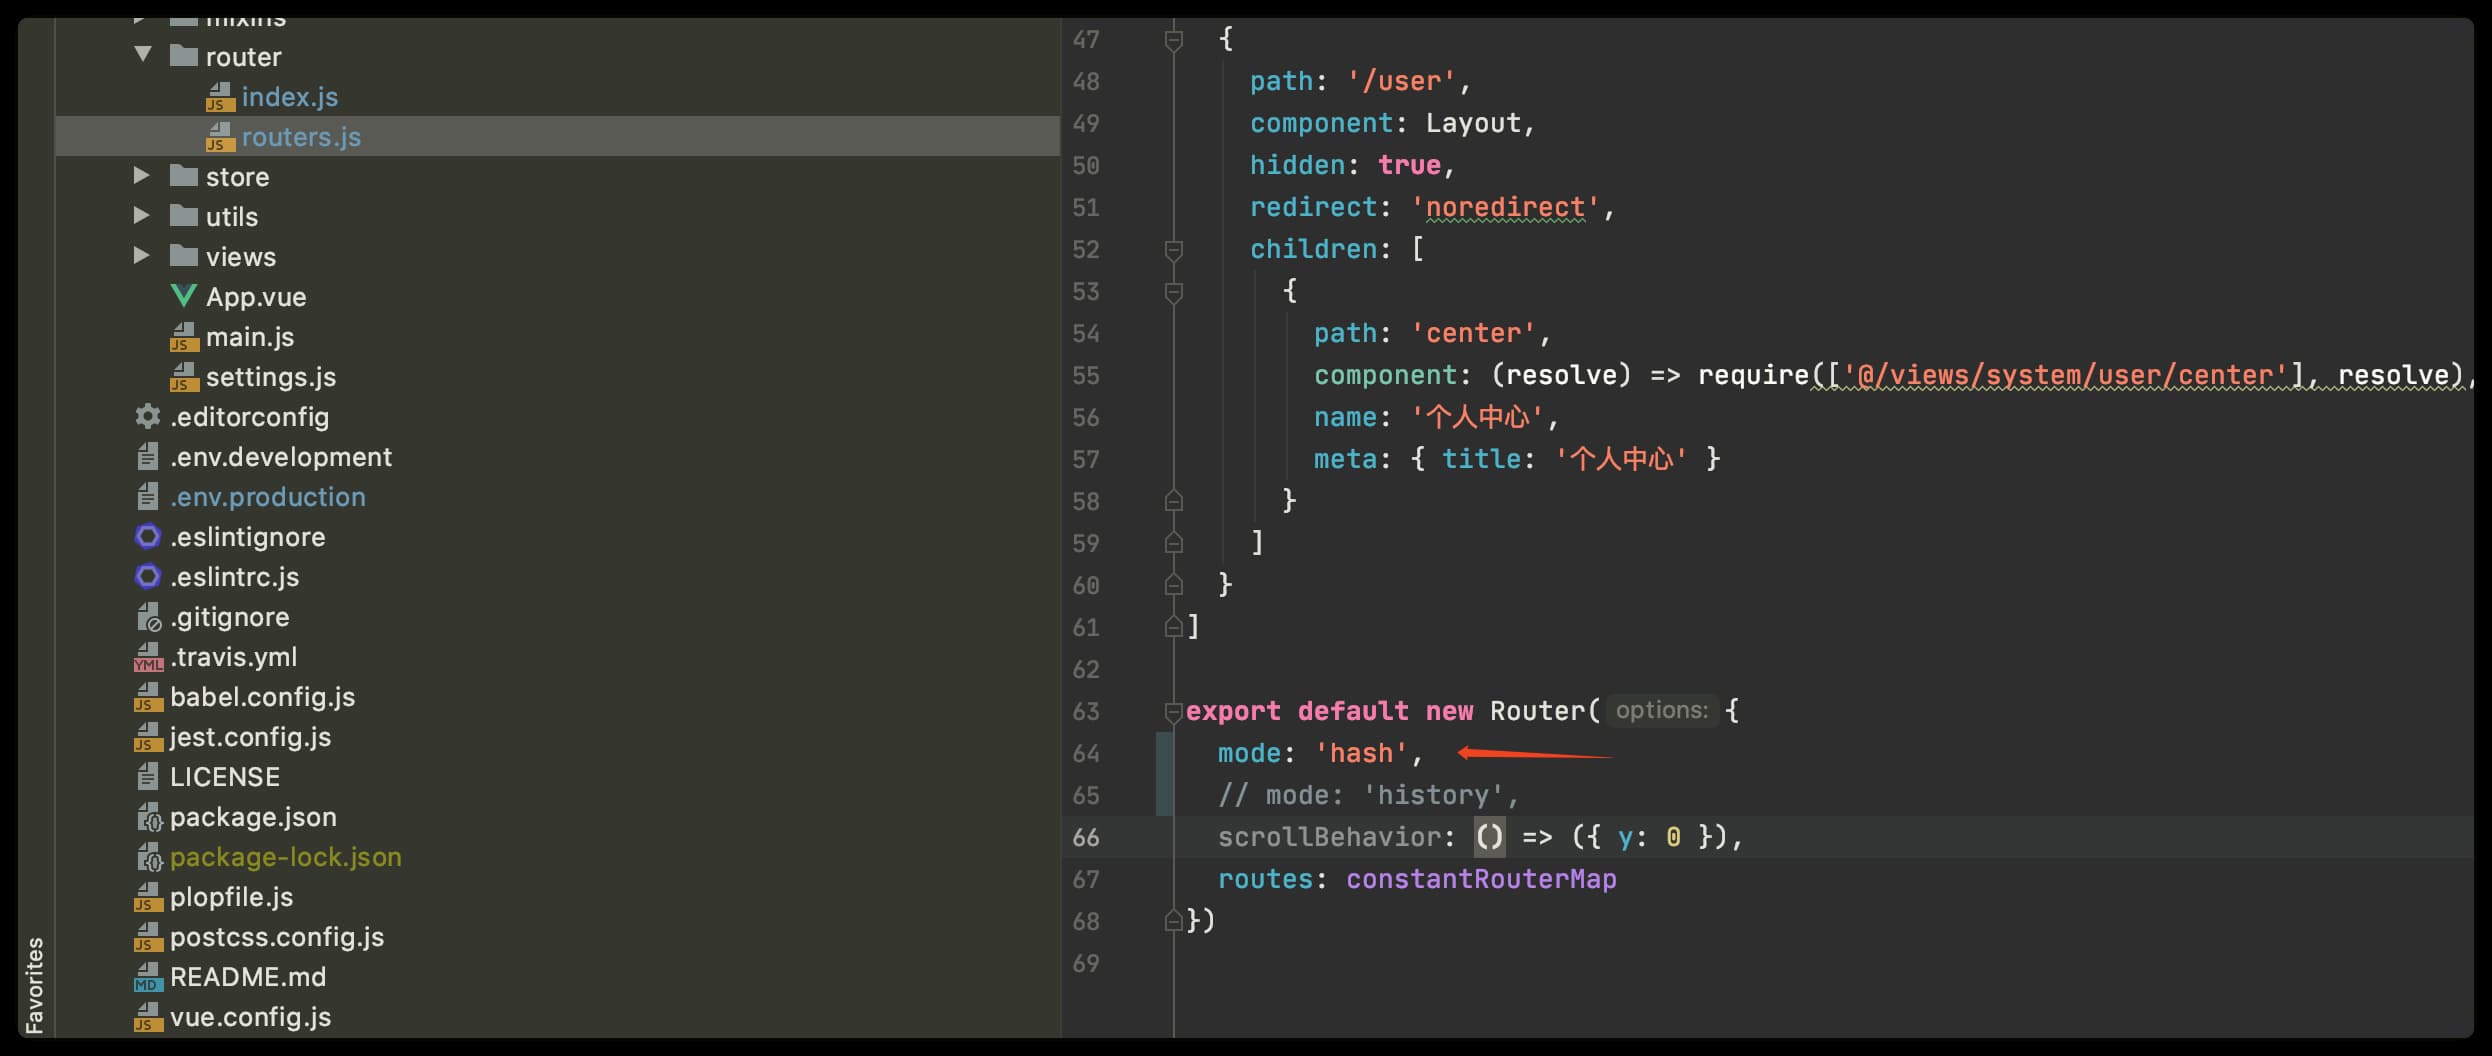
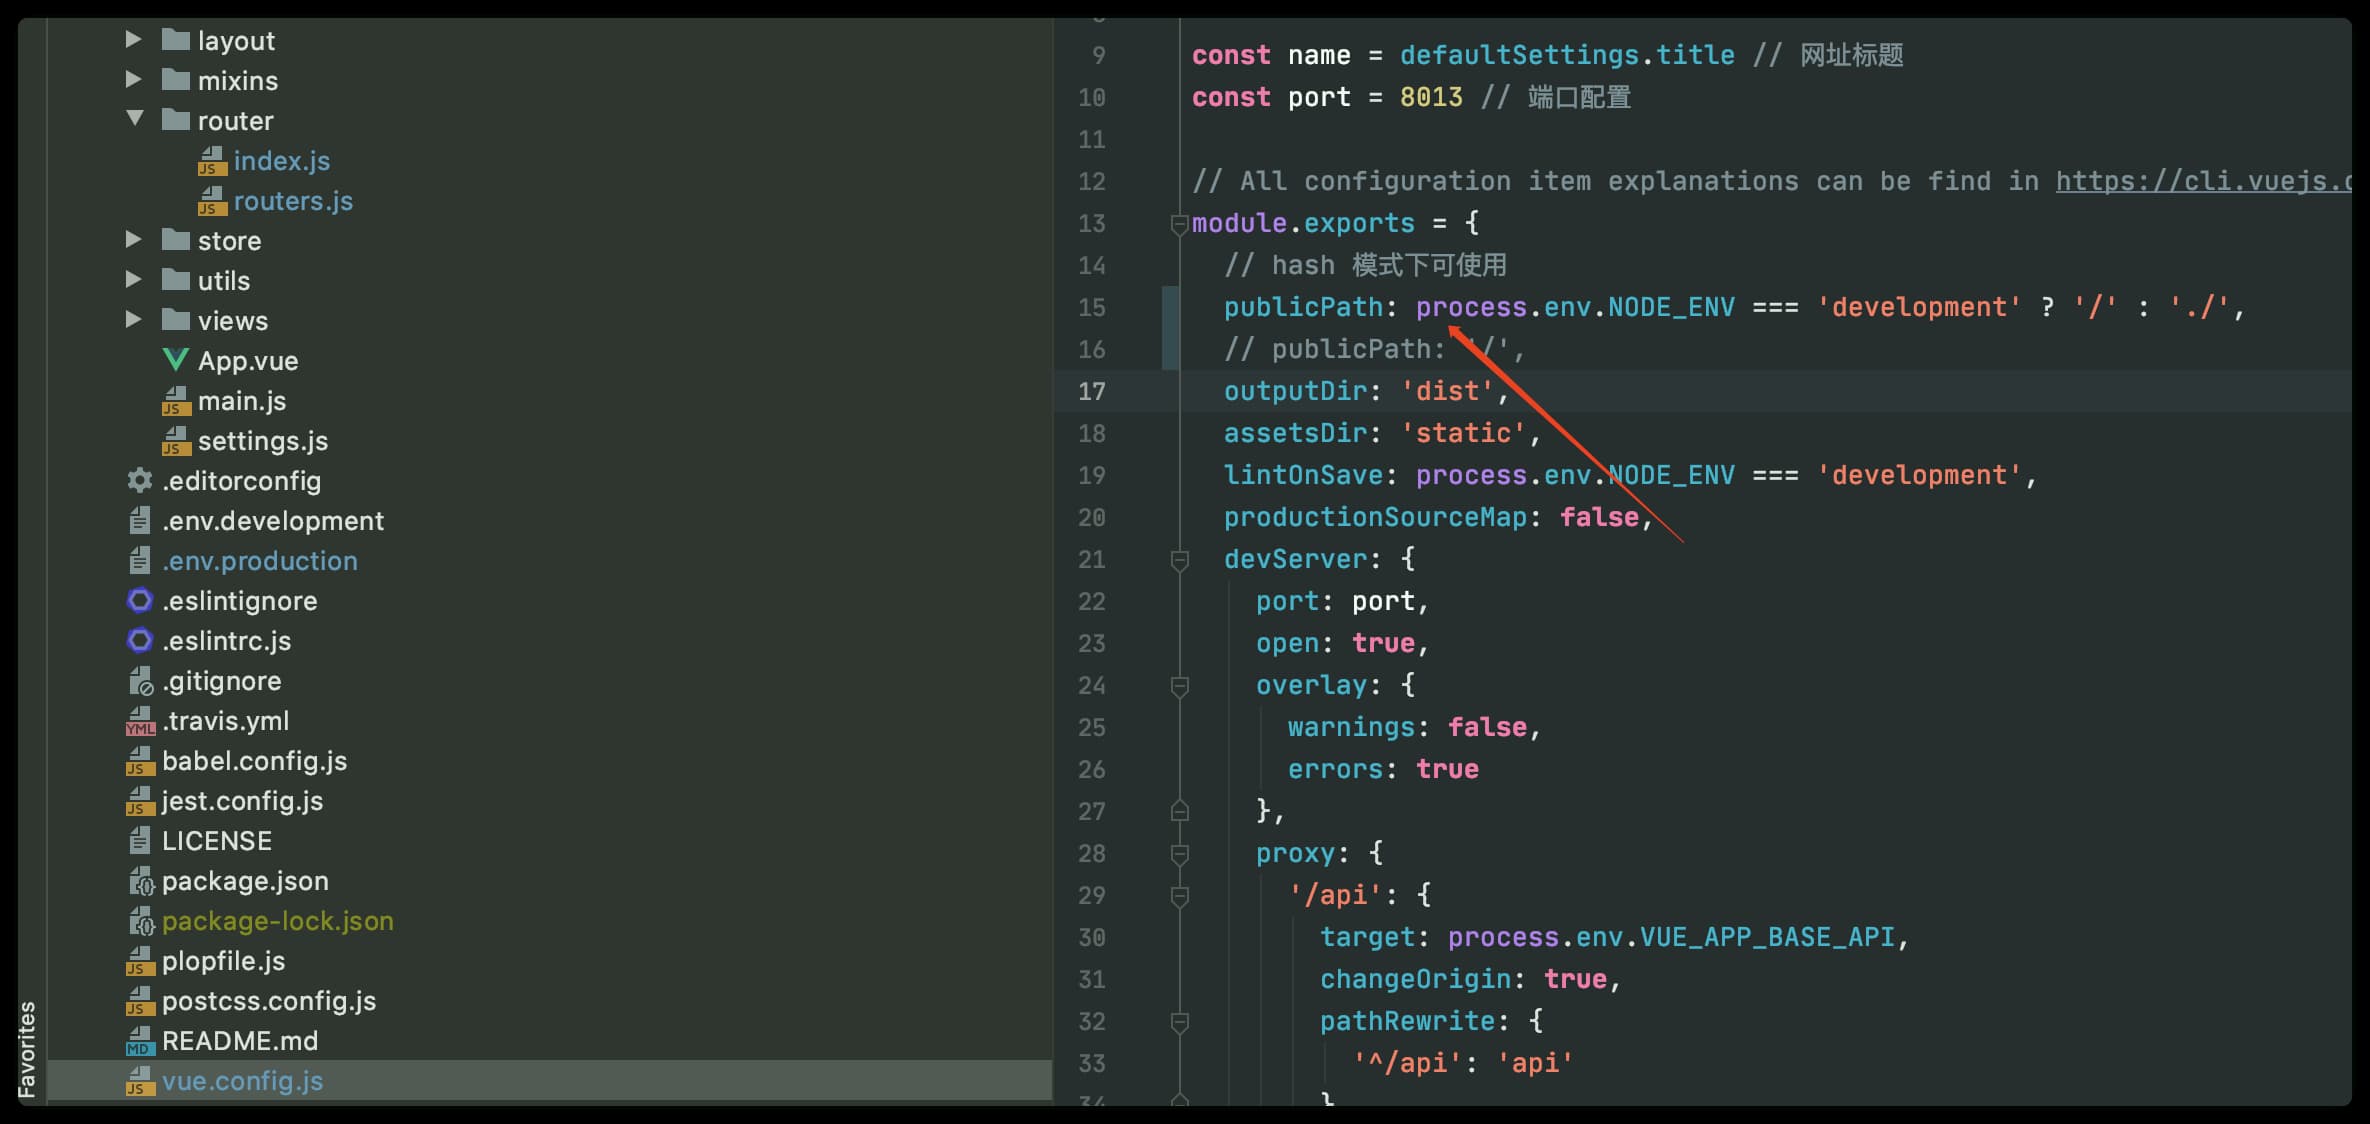
# Hash 模式
# 1、修改 routers.js,取消 hash 的注释
# 2、修改根目录 vue.config.js 配置,取消 15 行的注释
# 打包项目
不管是将项目部署到 nginx 还是其他服务器,都需要先将项目打包
npm run build:prod
1
打包完成后会在根目录生成 dist 文件夹,我们需要将他上传到服务器中
# Nginx 配置
在 nginx/conf/nginx.conf 添加配置
# History 模式配置
server
    {
        listen 80;
        server_name 域名/外网IP;
        index index.html;
        root  /home/wwwroot/eladmin/dist;  #dist上传的路径
        # 避免访问出现 404 错误
        location / {
          try_files $uri $uri/ @router;
          index  index.html;
        }
        location @router {
          rewrite ^.*$ /index.html last;
        }
    }
1
2
3
4
5
6
7
8
9
10
11
12
13
14
15
2
3
4
5
6
7
8
9
10
11
12
13
14
15
# Hash 模式配置
server {
	   listen       80;
	   server_name  域名/外网IP;

	   location / {
	      root   /home/wwwroot/eladmin/dist; #dist上传的路径
	      index  index.html;
	   }
}
1
2
3
4
5
6
7
8
9
2
3
4
5
6
7
8
9
# 二级目录部署
# Nginx 配置
server {
	   listen       80;
	   server_name  域名/外网IP;

	   location /dist {
	      root   /home/wwwroot/eladmin/test;
	      index  index.html;
	   }
}
1
2
3
4
5
6
7
8
9
2
3
4
5
6
7
8
9
文件目录
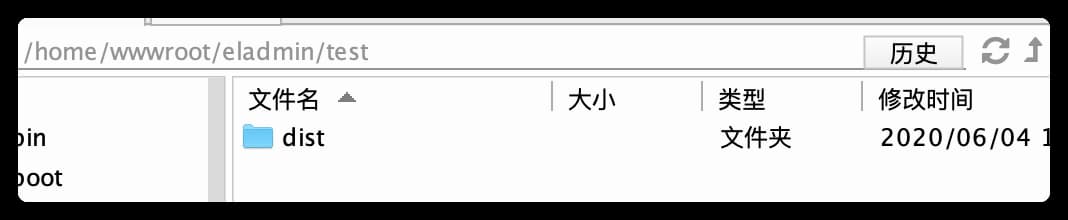
注意目录名称要与配置名称一致

# 重启Nginx
systemctl restart nginx
1
重启 nginx 后,访问你的域名或者IP地址即可
帮助我们改善此页面! (opens new window)
上次更新: 2024/09/11, 14:38:28